Ever wondered how to target your glutes in a new and effective way? The B Stance Hip Thrust might be the answer you’re looking for.
It’s a variation of the traditional hip thrust exercise that focuses more intensely on one side of your glutes, offering a challenging yet rewarding experience.
In this post, you’ll learn
What is B Stance Hip Thrust
The B Stance Hip Thrust is a variant of the traditional hip thrust exercise, designed to put more emphasis on one side of the glutes at a time. While the classic hip thrust engages both sides of your glutes equally, the B Stance variation shifts more weight and focus onto one leg, enhancing unilateral strength and muscle development.
This adjustment not only challenges your muscles in new ways but also aids in correcting imbalances between the two sides of your body.
To perform the B Stance Hip Thrust, you start by positioning one foot flat on the ground, with the other foot’s toes touching the floor slightly behind. This setup creates an asymmetrical stance, hence the name ‘B Stance.’ The majority of your weight should be on the heel of your front foot, allowing you to drive through the heel and lift your hips off the ground.
The other leg, with toes lightly touching, acts as a stabilizer rather than the main driver of the movement.
Benefits of B Stance Hip Thrust
The B Stance Hip Thrust is more than just another exercise; it’s a powerful tool for enhancing your lower body strength and aesthetics.
Improved Glute Activation
This exercise targets your glutes in a way that few others can match. By focusing on one side at a time, it ensures that your glutes are fully engaged throughout the movement, leading to better muscle activation and growth.
Enhanced Muscle Symmetry
It’s common to have one side that’s stronger or more developed than the other. The B Stance Hip Thrust helps correct these imbalances by allowing you to concentrate on each side individually, promoting more symmetrical muscle development.
Increased Core Stability
Maintaining your balance during this exercise requires significant core engagement. As a result, you’ll not only work your glutes but also strengthen your core, which is vital for overall body stability and performance.
Lower Back Safety
Compared to other lower body exercises that can strain your back, the B Stance Hip Thrust is relatively safe for your lower spine. By keeping your back stable on the bench, it minimizes the risk of injury, making it a safer choice for people with back concerns.
How to Perform B Stance Hip Thrusts
Here’s a step-by-step guide to ensure you perform this exercise effectively and safely.
What You Need:
- A bench or stable surface
- Weights (optional, depending on your level)
- Exercise mat for comfort
Step-by-Step Guide:
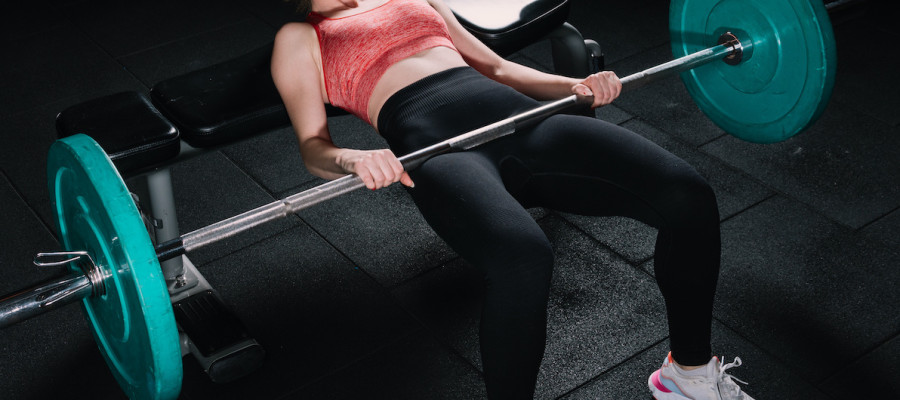
- Set Up: Position yourself near a bench, with your upper back resting against it. Place an exercise mat on the floor for extra comfort if needed.
- Positioning: Sit on the ground with your knees bent, feet flat on the floor. If you’re using weights, position them securely over your hips.
- B Stance Formation: Shift one foot slightly forward, making it your main support. The other foot should be slightly back and only lightly touching the ground, acting as a stabilizer rather than a primary force.
- Initiate the Thrust: Drive through the heel of your main support foot, lifting your hips towards the ceiling. Your upper back and shoulders should remain in contact with the bench, forming a straight line from your shoulders to your knees at the top of the movement.
- Squeeze at the Top: Once at the top of the movement, squeeze your glutes hard for a moment. Ensure your core is engaged to protect your lower back.
- Return to Start: Lower your hips back to the starting position, controlling the movement smoothly.
- Repeat: Complete your set number of repetitions on one side before switching the positioning of your feet and repeating the same number of repetitions for the other side.
Safety Tips:
- Start without weights to get used to the movement and ensure proper form.
- Keep the movement controlled, especially when lowering back to the starting position.
- Ensure your bench or surface is stable to prevent any unwanted movement.
staggered stance Vs B stance
Staggered Stance involves positioning one foot a small distance ahead of the other, with weight distributed between both feet. This approach is excellent for enhancing balance and focusing on the strength of each leg individually, while also engaging the core for stability. It’s useful in exercises like lunges and deadlifts, where a slight shift in weight distribution can increase the intensity of the workout for one leg without disengaging the other.
B Stance, on the other hand, requires placing the back foot’s toe in line with the front foot’s heel, with only the toe of the back foot touching the ground. This significantly places more weight on the front leg, turning the back leg into a support. This stance is particularly beneficial for glute-focused exercises, such as hip thrusts, as it allows for more concentrated muscle engagement and development on the active side.
Differences include:
- Weight Balance: Staggered stance spreads weight more evenly across both legs, whereas B stance concentrates weight on one leg.
- Muscle Targeting: Staggered stance aims for overall balance and muscle engagement, while B stance focuses on intensifying work on a specific muscle group.
- Application: Staggered stance is adaptable to various exercises. B stance is often used for targeted glute activation.
FAQ
1. What exactly is a B Stance Hip Thrust?
A B Stance Hip Thrust is a variation of the traditional hip thrust exercise, focusing more intensely on one side of the glutes. It involves one leg taking the majority of the load while the other acts as a stabilizer, with the back foot’s toe aligned with the front foot’s heel.
2. How does the B Stance Hip Thrust differ from a regular hip thrust?
Unlike a regular hip thrust that evenly distributes weight across both legs, the B Stance Hip Thrust shifts most of the load to one leg, enhancing unilateral glute activation and allowing for targeted muscle development.
3. Who should incorporate B Stance Hip Thrusts into their workout routine?
Anyone looking to improve glute strength, correct muscle imbalances, or add variety to their lower body workouts can benefit from incorporating B Stance Hip Thrusts.
4. What equipment do I need for B Stance Hip Thrusts?
All you need is a bench or stable surface for your upper back and optional weights (like a barbell or dumbbell) to place across your hips for added resistance.
5. Can B Stance Hip Thrusts help with muscle imbalances?
Yes, by focusing more on one side at a time, B Stance Hip Thrusts can help identify and correct strength imbalances between the left and right sides of the body.
6. How many repetitions and sets are recommended for B Stance Hip Thrusts?
A general recommendation is 3-4 sets of 8-12 repetitions per side, but adjust based on your fitness level and goals.
7. Are there any common mistakes to avoid while performing B Stance Hip Thrusts?
Yes, common mistakes include not keeping the spine neutral, failing to fully extend the hips at the top, and placing too much weight on the stabilizing leg. Focus on form and control to maximize benefits and minimize the risk of injury.